Redcoat renewed?

Our redcoats are used 5 days a week all through the school year, and understandably get quite faded. They get retired before they are worn out due to the color change…they’re more like pinkish redcoats by the time we replace them. 

Our Sgt. sashes also get quite faded, but the fringe more then the rest, as it’s exposed quite a bit more. Lockton said that someone told him to use fabric spray paint on it to renew the color ( I had never heard of fabric spray paint, but it’s a thing!). 

Worked pretty well! So…I decided to try it on a recently retired redcoat that was in good shape except for the fading. We taped them all up to cover the lacing and buttons (and we’ll be more particular if we do it again!), and I went to town with the spray paint. 

You can see how bad the fading is from the opened up cuffs and lapels where its not faded at all.

Here’s how it looks half done….looking good!

Looks so much better! It does change the feel of the wool a little bit and it’s almost a bit tacky. It’s not uncomfortable to wear (although I dont know how it will breath yet). It may have come out this way due to my impatience, and if I try it again (likely) I’ll follow the directions more closely (do one light coat, let it dry, repeat!), and I think the results will be much better. But all in all, $15 to renew a $600 coat for a couple more seasons is totally worth it (just don’t touch the stiff coat!)!

Civil War Shawl

I started knitting this shawl the last time it was cold, and now that summer is almost over, it’s done! We have a couple of sontags I knitted, along with some plain woolen cloth shawls, and 2 coats, but sometimes we need more to keep the girls on tour warm. So I’ve been knitting this on and off, in odd hours, usually while waiting for my kids. Its knitted with two strands of wool yarn, and I went through almost 16 skeins of yarn.

 WIN_20150903_090904 WIN_20150903_090916

Its from a pattern in a book, that was based off of a shawl in Peterson’s magazine. I’m better with modern instructions though, as I don’t knit enough to feel comfortable trying to figure out a modern pattern. The book I used is Civil War Era Knit and Crochet Patterns, by DeAnn E. Upton.

WIN_20150903_090832 WIN_20150903_090804

I probably won’t be knitting anything for a while, I have lots of stays that have been re-boned, but now need to be re-bound!

18th Century Faire at Riley’s Farm

This July we hosted an 18th Century Faire for the very first time! It was such an adventure, with guest numbers close to 400 3 of the 4 weeks. The other week was about 250, which was great, because we had downpours half the day! The first year we do an event is always a gamble, but this one was well attended, and people really seemed happy to be there and learn about all kinds of 18th Century things. I’m only going to show your our tent, because well, that’s mostly the only place I was! There was lots of other fun stuff going on, I just didn’t see much of it.

WIN_20150718_095821 WIN_20150718_095846

When you come into our tent you are greeted with children’s clothes. We pulled out our stash so the kids could try on breeches and petticoats and whatnot. Next year we may try to have a rental service of some sort, because everyone wanted to keep their 18th Century clothes on and go explore, but we couldn’t let them leave the tent. There were some really cute kids running around in our tent though!

WIN_20150718_095825 WIN_20150718_095856

To the left of the dress up area were some things for sale, pinned to the tent wall. Abi made us 6 bergere (straw) hats, 5 aprons, 3 ladies caps, and 3 men’s caps. We weren’t really a selling tent, but we wanted to have something to offer. We ended up selling 3 bergere (straw) hats and 1 cap on the last day. Everything else we can put into our stock for living historians. Yay for stock! In the middle of the tent we had our two work tables.

WIN_20150718_095909 WIN_20150718_095913

On the end of Abi’s work table we laid out swatches from Burnley and Trowbridge, which had all kinds of 18th Century fabrics for people to touch and feel. There were linens, wools (worsted, melton, coating), cottons, silks, camlets, and some others I don’t remember the name of right now. We also had a project for people to help us with, and earn a slice of pie. We had Katrina Van Tassels gown for Sleepy Hollow ready, and we were hemming trim to add to it. Whoever helped us with hemming trim, got free pie! We also had a Tambour frame, which is a really fun type of embroidery. It’s sort of like crocheting on fabric. We’re hoping to do some pieces with it for plays and filming. On my table we had cockade and breastknot making. This cost one activity ticket, because you got to take it home.

WIN_20150718_100015              WIN_20150718_100021

Behind the activity tables we had Katrina Van Tassels gown, and a banyan, for display. The banyan is one we made for a character in Courage, but we wanted to display some menswear too. This gown will not be worn with the green handkerchief, but I wanted the handkerchief to be seen (I got it for my birthday!). The gown will be trimmed with white organdy, a large flounce on the petticoat, and flatter puffed or pleated trim all around the neckline and down the fronts, and some on the sleeves too of course. Another post about the completed gown will be coming (as soon as it’s done, of course!).

WIN_20150718_100026 WIN_20150718_100009

Behind Jack and Sloey (the dressforms), were our ‘museum’ tables. We decided to display underwear, because every one would see the outerwear on all the people manning the faire. We wanted to show what went underneath, and people tend to ask anyway. So we had another banyan, a man’s shirt, stock, cravat, cap, apron, stockings, and a ladies shift, two pairs of stays, mitts, bibbed apron, caps, pockets, hip rolls, a rump, pocket hoops, stockings.

WIN_20150718_095921 WIN_20150718_095956

At the far end we had a display of cosmetics and beauty products. On the shelves we had a pitcher and basin, with a sponge of course, and towels I made for this display. We featured products from LBCC Historical, because I had seen them several times, and wanted to do this display. They come with lovely period looking labels, and when we got to play with them we were not disappointed. They are lovely products! They smell really good, and she used period recipes to make them. We had lots of people stop in this area to inspect all the goodies. There was face scrub (located by the pitcher and basin of course!), cold cream, lip tint, lip balm, face salve, burnt cloves (for darkening the eyebrows), rouge, body powder…. I also had hair powder and pomatum from Heirloom Haircare. I had my hair pomaded and powdered the entire month of July. I took a class at Costume College about it (from the lady who runs Heirloom Haircare), and apparently I wasn’t using nearly enough pomade or powder. I also wasn’t that itchy before though!

WIN_20150718_095944 WIN_20150718_095929

The products were so cute displayed! I loved that my chatelaine ended up in the mirror when I took this picture. Sneaky little thing!

WIN_20150718_100612 WIN_20150718_100617 WIN_20150718_100630

Abi and I decided that we needed pictures of our costumes too! We had made them specially for this faire, since most of the time we are in the workshop, and not seen! We both have really old working class outfits that we wear if we are on tour, or we snag something from stock. But for faire, since we were representing fashion, we though we should be a little more in style! I made a pet en lair, or short sack back jacket, worn with a matelasse petticoat I had snagged some time ago off the Courage set. I love this petticoat so much, I didn’t want anyone else to get a hold of it and ruin it….at least that’s my story, and if we need it for filming, I’ll give it back!  Worn with my American Duchess shoes of course, and new stockings (for my birthday! My sisters sure know what I like!).

WIN_20150718_100738 WIN_20150718_100743 WIN_20150718_100752

Abi made a gown from 1780. It came out really well, and I’ll see if I can get her to do a blog post about it. I think this is the first costume she’s really made for herself, with proper fittings and all. I’m sorry the butt bow is squished in the pictures, but we forgot to fluff it up. She also made a lovely bergere, which I’ll ask her to show in her post. Sorry this is such a long post, but Faire took up most of June to prep, and a lot of July! It was a very fun experience, and I’m sure next year it will be even better!

Corsets


   IMG_1025

We have been sadly lacking the proper foundations for all our girls at the barn. We have some ill fitting stays at Colonial, but at least everyone has something. Stays are on the summer list.

IMG_1024

This corset was made for Miss Lizzy, who requested a pretty corset (instead of a plain white utilitarian one). She picked her outer fabric, and I quite like the effect. The inner linings on all the corset are two layers of duck cloth or canvas.

IMG_1023

Even though Lizzy runs the kitchen up at the barn, she has been very faithful in wearing her corset and historical clothing. The corset she had been wearing was sadly bent out of shape, with bones poking out and the whole thing just falling apart.

 IMG_0830

This one was for one of my store girls. I wish I had done a bit more fitting on it with her before it was too late to do anything. It’s not a perfect fit, but under her dress you can’t really tell.

IMG_0832

This was the first time she had worn it, and I think she tightens it a bit more now, which also helps the bagginess in the front bosom area.

IMG_1508

Miss Kaitlin! She loves her new corset! I had to tell her she can’t wear it instead of her stays when she works colonial though. Kaitlin is also wearing one of the new 1840’s chemises, made for our Gold Rush girls, by Abi.

IMG_1509

These were all made from Truly Victorian, #TV110. I love the Silverado corset from Laughing Moon also, but the TV may have edged out ahead in my book.

IMG_1499

This one is from Miss Victoria, who also works in the barn kitchen.

IMG_1502

While corset did change from the years 1849-1880, we are sticking with the slightly later corset to use underneath all eras. As we get at least a basic corset on the girls we may go back and add in some earlier ones.

IMG_1503

The last corset from the new batch, for the unnamed historian! A few of my girls are camera shy in their underware! She is also wearing one for the new 1840’s chemises Abi made. The necklines ended up being quite large (a problem we have had with our shifts also), so she decorated and fixed it all in one step with ribbon insertion lace.

IMG_1497 IMG_1498

More corsets and underwear to come. We are not even halfway through our list, but the improvements are already starting to show!

Old Joe Dresses – Batch One


We have been trying to figure out what works best for our Old Joe girls, and have discovered that Past Patterns #903, Late 1880-92 Day Dress, is a great fit. We have made it for several size’s of woman now, and if fits all of them beautifully, with a minimum of fitting. We did make a toile (fitting muslin) for each one, and there was not much to fuss with. We have made two piece outfits for them in the past, but we really like the look of the dress for our everyday working girls. The whole theme of the barn area is 1880’s, so the girls in the store and the girls in the bakery wear 1880’s clothes, regardless of which tour is going on. Sometimes we have two different tours going on up there, so it would not work for them to dress according to tour anyway.

Miss Tori in her new tour dress. Abi made this one, I am very pleased with the way it came out. And the fabric Tori picked….I kind of want to steal it!

IMG_1183

IMG_1185

IMG_1186

Miss Sofia in her new store dress. The collar on hers ended up being a slight bit wonky, but she folded it down and it looks darling! I am guilty of the slightly wonky collar…I made this one.  I’m really glad I added the trim, the dress was really plain without it.

IMG_0835

IMG_0836

IMG_0837

A proper petticoat to go underneath. This one was for Tori I believe. The fabric is not super accurate (or accurate at all…), but we are still trying to use up our stash of inaccurate fabric in places it will not be seen. This petticoat if from Truly Victorian. The instructions are a tad bit confusing at first, in that there are four different eras of petticoats included, and the instructions are basically the same. Once you figure out how they are laid out however, they are super easy. This one is for the natural form era, which does not allow enough length for a bustle. Since the girls won’t be wearing bustles with their everyday dresses anyway, we didn’t want the petticoats dragging in the back.

IMG_1383

There are rows of tucks in the back to help give the petticoat more body in the back. The front is smooth, so give a cleaner line.

IMG_1384

Abi has made several petticoats, but she has a habit of giving them out before I get to take a picture!

Ca. Gold Rush Dresses: Batch One


IMG_0974

Our girls at the barn area have been sadly neglected long enough! The tours we cover at the barn are Ca. Gold Rush, Civil War and Old Joe. Old Joe is based in the 1880’s, when Joe Wilshire acquired the farm. The story goes he bought it for something like a saddle, a jug of whiskey and some chickens. It’s been a while since I heard the particulars though.

IMG_0975

We do have some Civil War dresses and underwear that look pretty good, but we haven’t had any really good accurate Gold Rush dresses yet.

IMG_0971

We started with Tori. She hasn’t had anything that actually fit her properly since she started working at the farm, and this is her second season. We have decided to make things we are desperate for on an as needed basis, but focus as possible on one historian at a time to get their whole wardrobe squared away. We are picking people that have been with us at least one season, and are planning on staying with us.

Tori now has a properly fitted corset, chemises, a corded petticoat and two tucked petticoats. Somehow I didn’t get a picture of anything except the corded petticoat. Darn corded petticoats take forever, but they are worth it! She isn’t wearing the petticoats in the above pictures. We made her corset and her dress first. Abi did a lovely job on this dress! It’s from a Laughing Moon pattern.  The waist is a bit bulky, so the bottom button wouldn’t button. We put a skirt hook there, and it works just fine! The corset is a Truly Victorian pattern. The corded petticoat and the tucked ones are from Elizabeth Stewart Clarks book.

IMG_1151

Miss Jessica was next on the dress list. I used the new pleated wrapper pattern from Laughing Moon. She’ll be getting the proper underpinnings as time allows.

IMG_1192

I love having the girls come in and pick their fabrics, if I’m making something for a  specific person I like to make them something they will love. It shows through when the feel good in their costume and they like it.

IMG_1193

IMG_1198

Miss Alison was next!

  IMG_1374

She said she wanted blue, I didn’t have a lot of just blue fabrics, but with the apron and the pleating on the bodice there is a fair amount of blue. She was happy with it, and that is what I was going for! Miss Alison is also on the list for proper underpinnings. She is the next historian we are focusing on.

IMG_1376

Next, but certainly not last, is Miss Jasmine.

IMG_1417 IMG_1420

She picked the dark brown initially, but there wasn’t enough for a whole dress. We found the lighter brown and just made a two toned dress. She loves it, and it really fits her personality and style. All the other historians keep telling her it looks like her.

IMG_1422

Another historian who needs petticoats, but at least she has a corset! With her apron it draws in at the waist a little bit more. I used Laughing Moons other wrapper pattern for this one. We have plenty more Gold Rush dresses coming, but so far I am pleased with the improvement in our historians wardrobes!

At the Ball!!!

IMG_0586

This lovely lady invited us to the Riverside Dickens Ball. We had a very good time, and I got my dress finished (barely!). It’s not truly finished if you aren’t sewing on the way to the event, right? All I had left was adding the rosettes to the bodice and some lace (I think).

IMG_0596

Fortunately I didn’t have to make all three dresses! Anne had her own, and I found one at work that would work for Gretchen (above, on the left). Gretchen and I have been best friends for over 25 years…gasp! Am I that old? And as it gets harder to spend time together due to school/kid/work schedules, we jumped at the opportunity to dress up and go play! We haven’t had done a photo shoot in ages, and the building was too cool to not take pictures. We got a little carried away, so enjoy the show 😉

IMG_0625

IMG_0646

 Mary Riley made the dress Gretchen is wearing. I believe it’s 1870’s, not 1860’s, but we added another skirt underneath to that it would be long enough for a hoop.

IMG_0634

IMG_0646

We loved the way the light was coming out of this doorway. Then we saw stairs….and we ventured up….

IMG_0672

IMG_0673

And at the top…sang a little opera!

IMG_0665

Inside we found an empty dining room…

IMG_0698

IMG_0707

IMG_0649

And had a little fun!

IMG_0705

IMG_0687

Feeling wistful on the way back out….

IMG_0684

At the bottom of the stairs…on to the next adventure!

IMG_0719

The highlight for Gretchen was meeting Dr. Who! Denver made a great Dr. Who. He had the screwdriver and everything 🙂

IMG_0732

Can’t leave out the hair! Gretchen made the leftover rosettes into pins for me to wear in my hair. They ended up being used by my daughter in her uncles wedding as well!

IMG_0677

 The lovely Anne had her hair done. They did a lovely job! We were all a bit jealous…

 IMG_0591IMG_0590

We had a great time, after all, you are never too old to play dress up with your best friend!

IMG_0676

Mitts and Dresses!

IMG_0459This week in the costume shop we have been making warm mitts for our Colonial girls. It has been quite frigid and we don’t have any in stock (except 1 pair of silk ones…). So I gathered up some short pieces of wool and ended up cutting out 19 pairs of mitts!

IMG_0464

Here they are all prepped. I sewed the side seam and the thumb seam on the machine.

IMG_0490

And here are a bunch of them done! The thumb is sewn on by hand. Much easier the trying to do that bit on the machine. I have 3 pairs that I’m still working on. 1 piece of wool ended up being a little bit ravely, so I had 4 pairs that needed the triangle flap lined and everything hemmed. Pictures of those when they are done (they are extra cute:).  The next batch will include some blue. I hadn’t realized I was missing such an important color, but several of the girls prefer it.

IMG_0493

Abi got this dress done this week, along with a bunch of mending. I think it turned out darling!! It’s late 1880s, and for Michelle, one of our store girls. She has been suffering in a short sleeved, low necked gown of an indeterminate era (someone gave it to us), because it was the only thing we had on hand that fit her. The new dress is much more becoming, and it’s much more accurate, which makes me happy!!

IMG_0494

It looks really cute with a white bibbed apron over it. Its made of a cotton reproduction print from http://www.reproductionfabrics.com.

Meanwhile, I finished a dress for Brittany, one of our other store girls. She is expecting a baby in May, so she needed something that would accommodate her new figure.

IMG_0443

IMG_0444

I used a yoked blouse pattern, added in extra panels for fullness, and extended them to become dress length.

IMG_0445

IMG_0450 IMG_0451

It is made out of a tiny green and white cotton print. The trim on the collar and sleeves is 1/4″ twill tape, and the ‘belt’ is just a length of 1 1/4″ twill tape.

IMG_0452 IMG_0453

Unbelted it just looks like a sack, but you can see how much fullness she’ll have to last her all the way through her pregnancy.

I went shopping yesterday to try and get everything else we needed for Sherlock, but came up a bit short. I’m going to order the rest online right now, and hope it all gets here in time!


18th Century Frockcoat Tutorial

By Mary JohnsIMG_2871

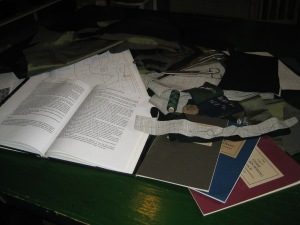
This tutorial is meant for someone who has perhaps already made a coat, but wants to make one with period techniques. I do love comments and questions, so if you are a beginner and need help, don’t be afraid to ask!

I’m also expecting you to be good friends with your steam iron, and you to use it after every step! It not only sets your stitches, but helps give you a professional result.

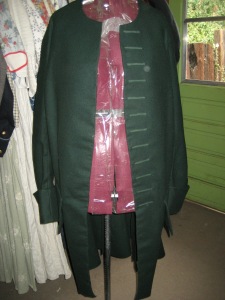
This coat was made with wool outer, silk lining, horsehair and batting (probably poly:( but I’m pretending it was wool:). I used linen thread throughout, waxed of course!

Step 1. Look at lots of books. Put away the books that are not helpful. The ones I stuck with for this coat are: The Cut of Men’s Clothes 1600-1900, By Norah Waugh – I used pages 86-92 for construction information. Page 84 was especially helpful for buckram and padding placement, even though the coat was a little earlier style then the one I made. I used page 93 to help guide me in  making the pattern. Book number 2: Costume Close-Up, Clothing Construction and Pattern 1750-1790, By Linda Baumgarten and Johns Watson with Florine Carr. I used item 17 to help me with construction details and cutting out, Pages 80-89. I also like to keep The Lady’s Guide to Plain Sewing Books 1 and 2, and The Workman’s Guide to Tailoring Stitches and Techniques handy. They are available from Kannik’s Korner. I use them frequently to remind myself of certain stitches or techniques.

Step 2. Pick material and cut it out.  I used a pattern for the base, then altered it using the diagrams. I wanted the coat to be circa 1770, but made for a gentleman who preferred the older styles, so a toned down version of a 1750 or 1760’s coat.

Step 3. Start construction! I started with the collar. IMG_2874 IMG_2875          
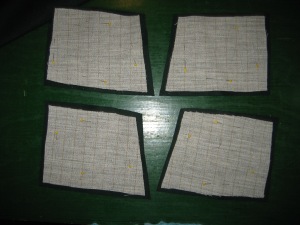
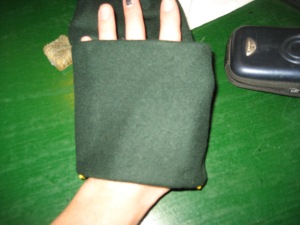
I cut out a piece in wool, a piece in silk and a piece in horsehair. The horsehair was trimmed to be about 1/4 inch smaller then the other pieces. I folded the wool up over it and stitched it to the horsehair. The silk then had the edges turned under and I stitched it to the wool. The silk was turned under to be smaller then the wool, so that it does not show on the outside. It tells you to use buckram for a lot of the support pieces, but I only had the kind I use to make hats, so I used horsehair instead.

Step 4. Add reinforcements.

                                                                                              IMG_2876 (2) IMG_2878 (2) IMG_2879 IMG_2880

In CMC (Cut of Men’s Clothes) it says to add a horseshoe shaped piece of Droit-fil (band of strong linen used for strengthening) to the tops of the side pleats. Lacking Droit-fil, I used horsehair. It is very carefully caught to the wool, trying not to let the stitches go all the way through to the other side.

Step 5. Add (buckram) horsehair to fronts.

IMG_2882 IMG_2886

In CMC is instructs you to tack to the reverse side, from top to bottom along the edges, 4 inches wide at the shoulders, widening to within 2 inches of the armhole, then narrowing to the seventh or eighth buttonhole where it continues straight to the bottom. I decided to fold the edge up over the horsehair, as I had done for the collar, because I couldn’t figure out how you finished that edge if you just tacked it down. Do this for the shoulder and the neck edge, as well as the front edge. Do this to both fronts (make sure you have opposites though!).

Step 6. Buttonholes.

IMG_2887 (2) IMG_2888 IMG_2889 IMG_2893

CMC says to mark the buttonholes, 2 or 2.5 inches long and 2 inches apart. Work the buttonholes. My favorite part! Very time consuming, but worth it. Buttonholes belong on the left side.

IMG_2883

 There are 12 buttonholes.

Step 7. Reinforce behind the buttonholes.

IMG_2895 (2)

CMC – a second piece of (buckram) horsehair is added the same size as the first, but only the length of the seventh or eighth buttonhole. Add the reinforcement to both fronts.

Step 8. Add droit-fil strip to the edge.

IMG_2903 (2)IMG_2899 (2)

Again you are supposed to use droit-fil, but I used twill tape for this one. You place it along the edge, pleating it to shape where the chest is rounded. You are supposed to whip-stitch all this to the edge of the coat, but again, I couldn’t figure out how that edge was finished with all that bulk, so I carefully stitched it to the wool where it was turned over on top of the horsehair. Do this to both fronts.

Step 9. Add padding.

IMG_2905 (2)

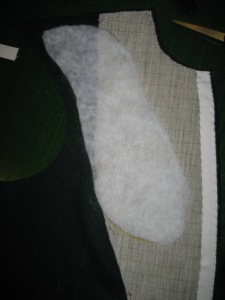
You add the padding to help fill out the hollow which goes from the chest to the collar bone. I used batting, because that is what I had. It said to use cotton wool. Make sure you do this to both fronts, or you will have a lopsided coat!

Step 10. Pockets!!

IMG_2909 IMG_2910

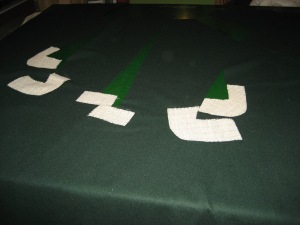
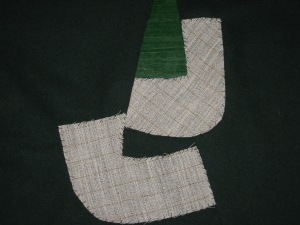
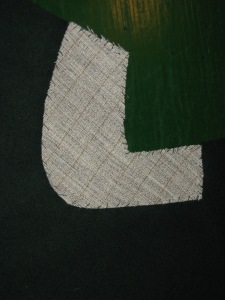
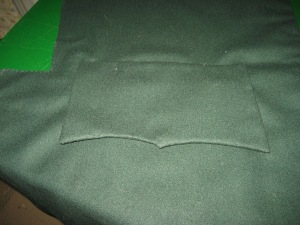
I started with the pocket flaps. I like to have them done first, because it seems like once you have the pocket holes in, it takes forever if the flaps aren’t ready. Same method as the collar, except I used wool for the front and the back.

IMG_2913

For the actual pocket part I did it a little differently then I normally do.

 IMG_2912IMG_2911

In Costume Close-Up it tells you that the pocket openings have interfacing around them, and to set them in you slash the fabric, then fold the edges back over the slash and stitch them down. You reinforce the ends of the slashes with buttonhole stitches. I only stitched to the horsehair, not through the fabric, except at the ends for the buttonhole stitch.

 IMG_2914 IMG_2915

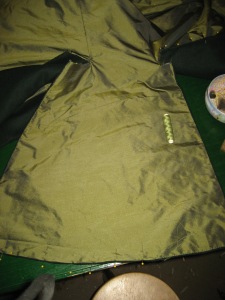
For the particular coat in Costume Close-Up that I was somewhat following, it tells you that the top part of the pocket part was of silk, so that when the pocket flap was up, that was all you see. This is what the pocket bag looks like. I then carefully stitched it in behind the opening, along the edge. You just have to make sure that the seam line for the silk is facing into the coat, not towards the pocket opening, and that the silk is sewn to the top part of the pocket opening, not the bottom. Then sew the sides of the pocket up.

IMG_2916IMG_2917

With the pocket flaps on. I just carefully did tiny whip stitches to attach the flaps.

IMG_2944  

This is looking down into the pocket.

 IMG_2947

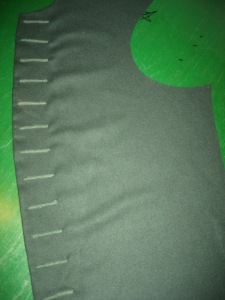
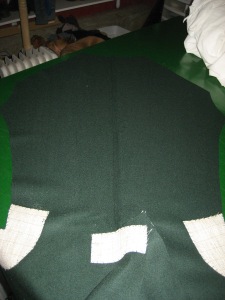
Both fronts, all prepped!

Step 11. Stitch the backs together, sew the fronts to the backs and sew the shoulder seams.

IMG_2948 IMG_2955

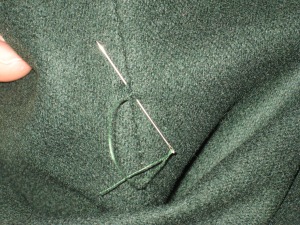
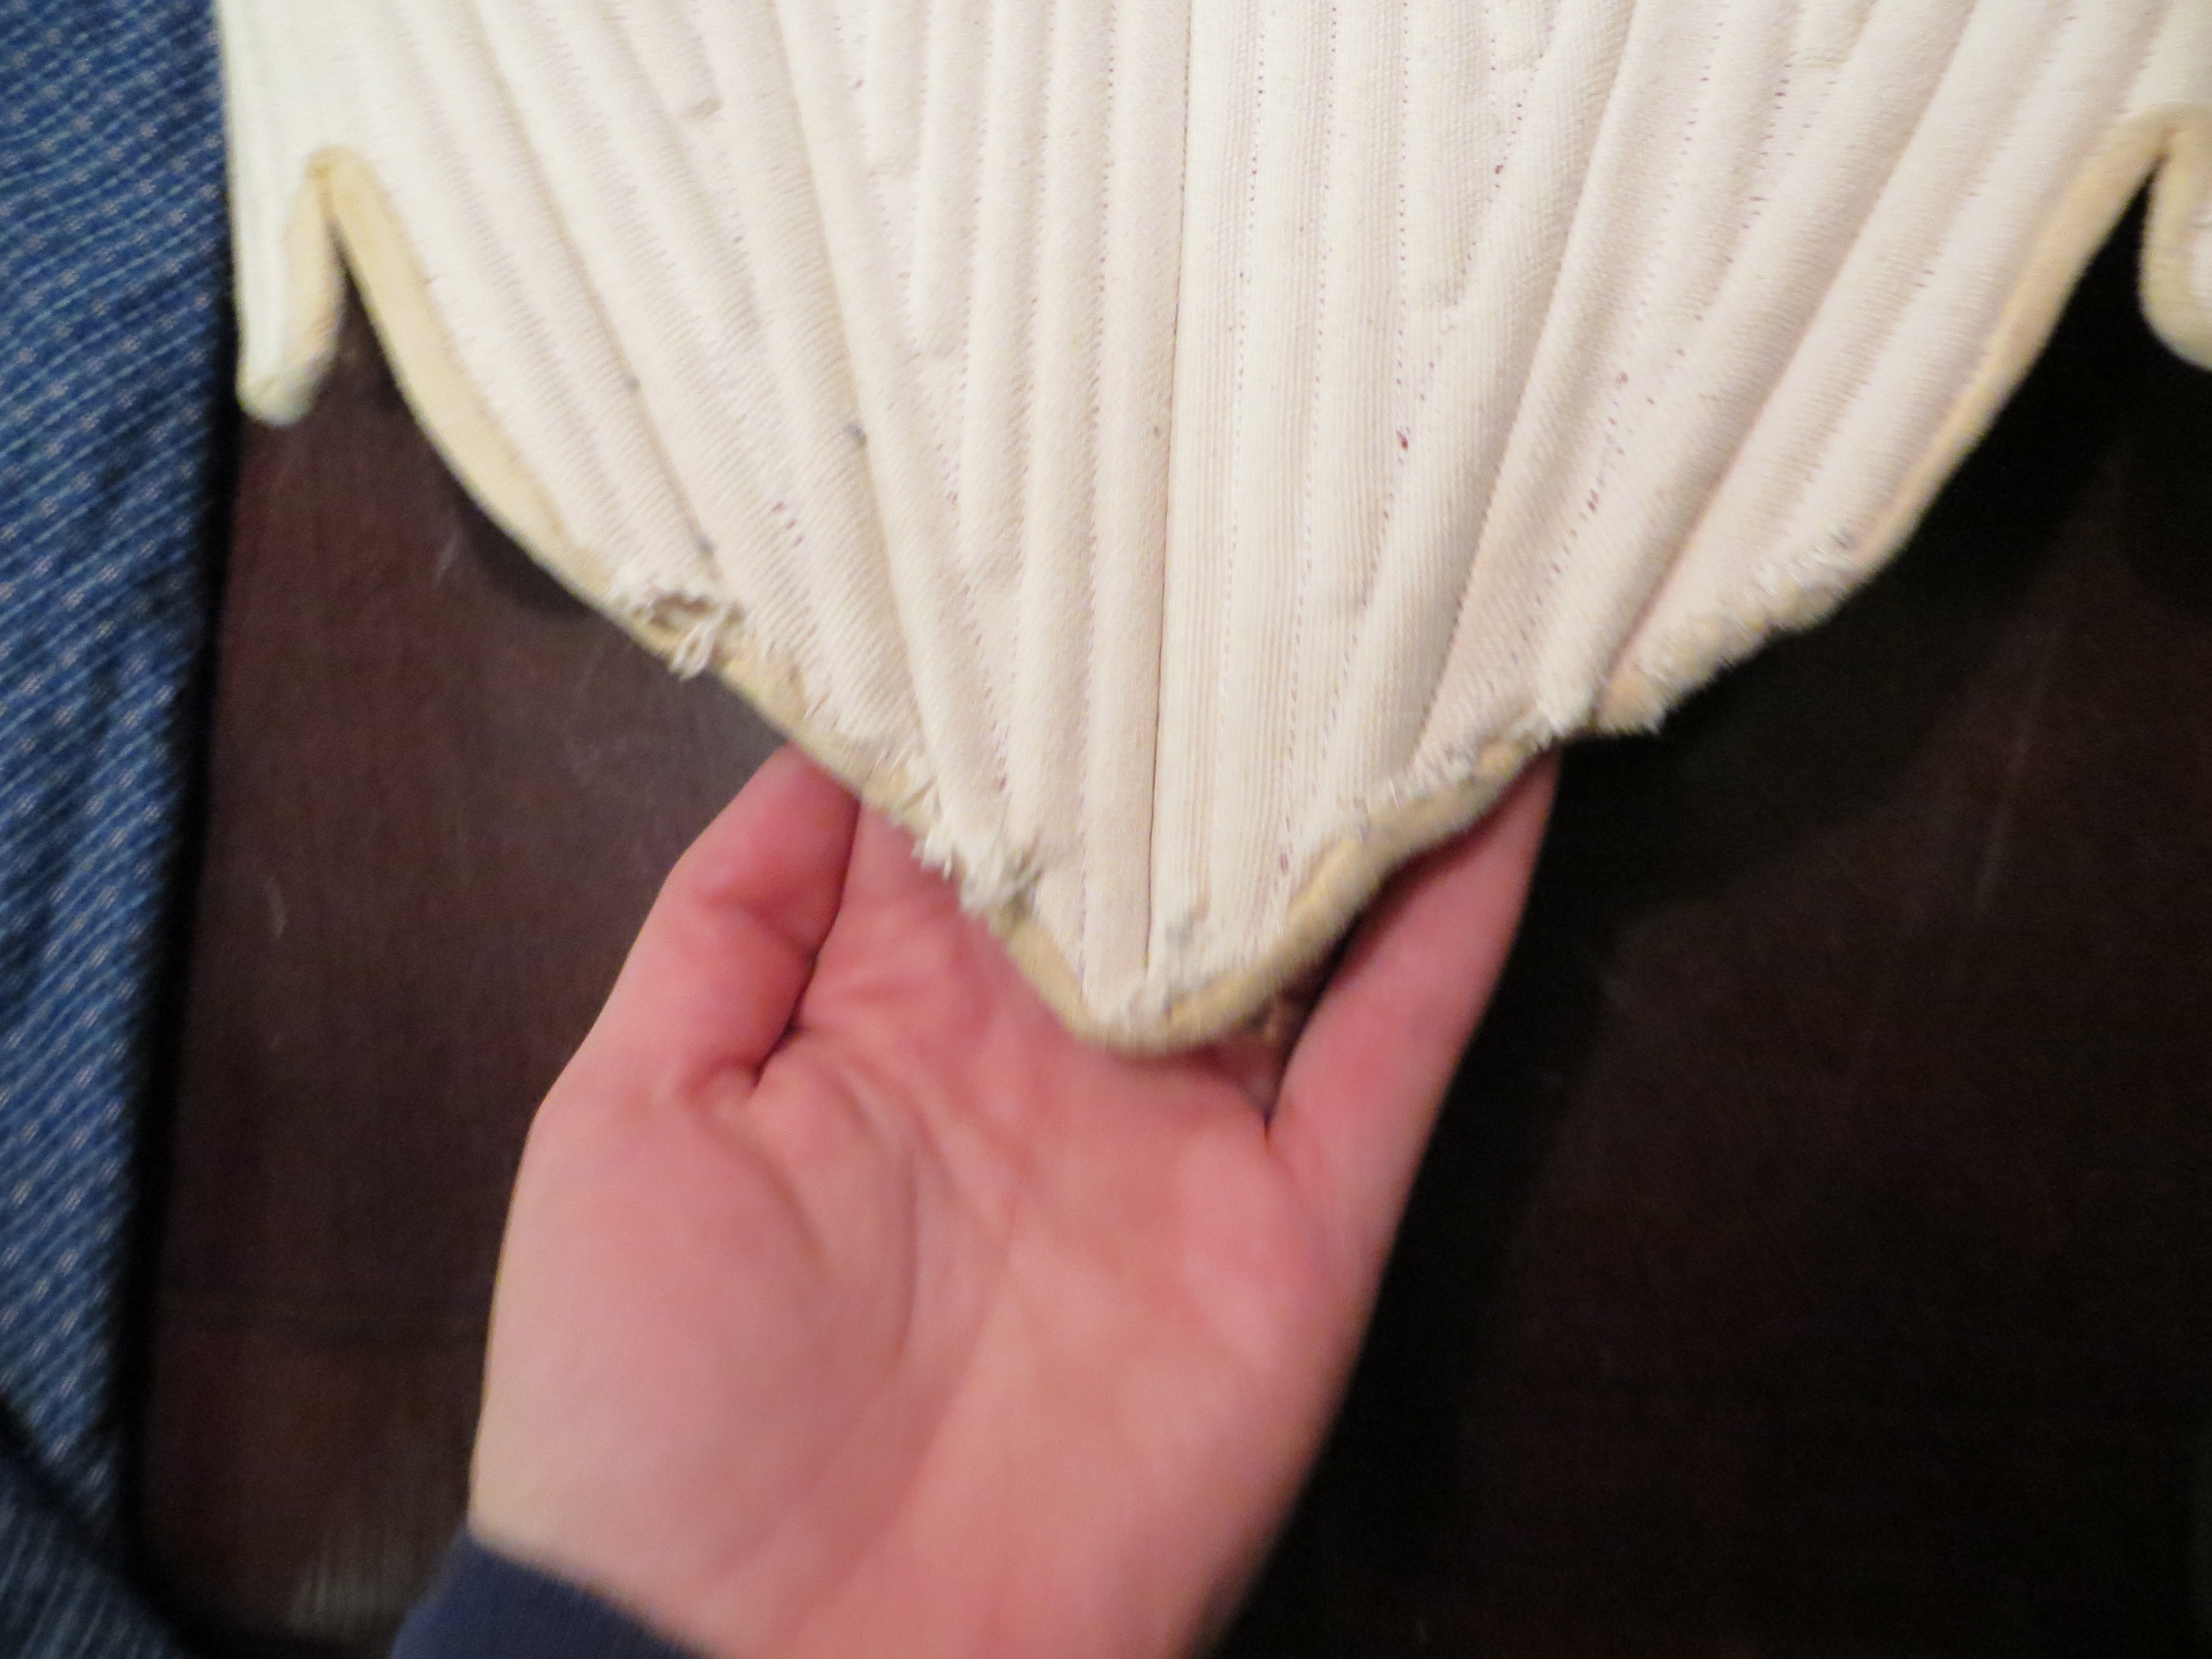
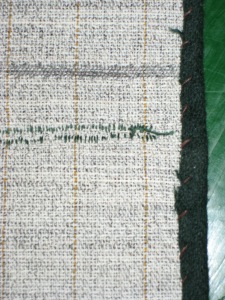
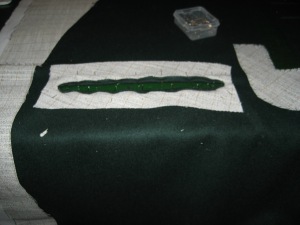
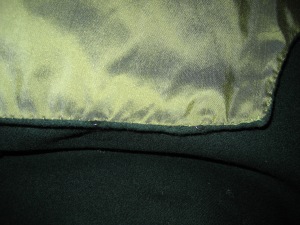
CMC tells you to backstitch it up from the skirt openings up, then to fine-draw it from the outside. I had to do a little research to find out what fine-drawing is, but basically what it comes down to is to sew together so finely that the join was not noticeable. I found exactly what the stitch looks like, but I didn’t write down my source:( In the picture above you can see what it looks like though. It is a tiny straight stitch that angles up between stitches.

IMG_2956 IMG_2957

Here the backs and sides are backstitched and fine-drawn.

IMG_2959 IMG_2960

And here the shoulders are backstitched and fine-drawn. When you set the shoulders together, make sure you leave the back neck just a little bit longer, so that you can fold the wool over the back neck edging. The collar is only pinned on here. I added it at the end.

Step 12. Neck edging

IMG_3003

Cut a piece of horsehair that will fit the center back neckline and go just under the shoulder seams. Stitch it down at the neckline, with the wool going over the top, just like the fronts. Stitch it at the shoulders, only to the seam allowance.

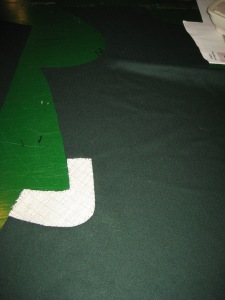
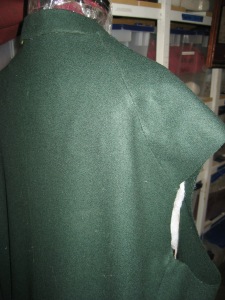
Step 13. Don’t sew the skirts together, or you will have to take them back apart like I did!

IMG_2964 IMG_2965

Pictures of what not to do!

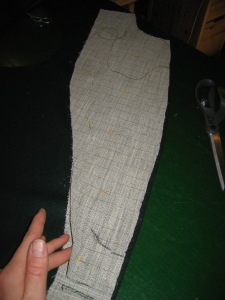
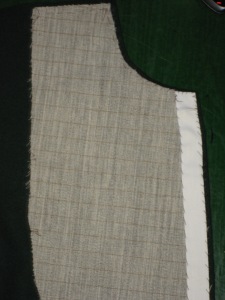
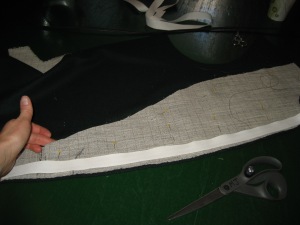
Step 14. Prepare the sleeves.

IMG_2967 IMG_2968 IMG_2969 IMG_2970

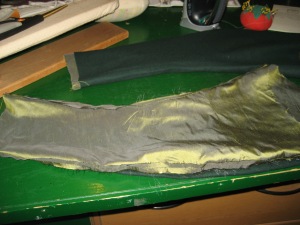
Sew the sleeves together. Sew the sleeve linings together. Set them together, make sure the seam allowances face each other. In CC-U it said that 1/2″ of the lining extended past the edge of the outer fabric, and was folded up to the outside and stitched.

IMG_2972

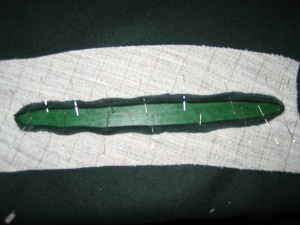
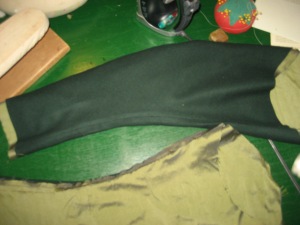
The cuffs are sewn next (or first), and I just did the fold the wool over the horsehair and stitch it down, then the add the silk turn under the edges and stitch it down thing. Then I whip stitched the sides together.

IMG_2998IMG_2999

The cuff sits just a little lower then the edge of the sleeve. The silk lining of the sleeve is stitched to the wool of the cuff.

IMG_3002 IMG_3001

This is what the inside of the cuff attachment looks like. You can tack the top of the cuff down at the side seams if you like.

Step 15. Set in the sleeves.

IMG_3004

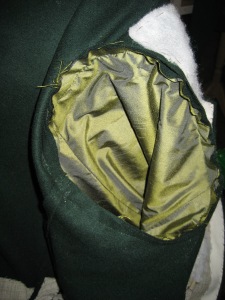
The sleeves are backstitched on for security. The armhole mess will be covered up when the lining is set in.

Step 16. Admire all your hard work and the amount of handstitching!!

 IMG_3009 IMG_3007

Step 17. Set in the lining.

IMG_3010 IMG_3013

I backstitched the back seam, the side seams and the shoulder seams.  I also set my two hooks and eyes to the wool so they peek out, then I set in the lining.

IMG_3010

I pinned everything very carefully (which says something, since I normally don’t pin anything!). The silk got turned under on all the edges, including around the skirts and the neck. Then stitch it to the wool using small even stitches. Try to catch the the wool under the lining and just have a tiny bit of the stitch catch the edge of the lining, and it won’t show very much. 

IMG_3016IMG_3017

Fold under the body lining and stitch it over the armhole mess, to the sleeve lining, just over the seam.

Step 18. Sew on the collar.

IMG_3018

I put the collar and coat right sides together and whipped stitched them.

IMG_3019 IMG_3020 IMG_3021 IMG_3022

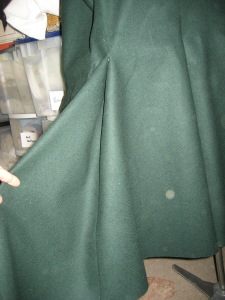
Step 19. Sew pleats into pleats!

 IMG_3027

Fold the pleats pleasingly, and stitch them down at the top, catching only the lining, and the seam allowance.

IMG_3029 IMG_3031

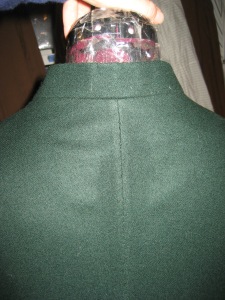
On my coat I folded the side pleats towards the center, then tacked them along the edges in a few spots to keep them closed. The center back is a box pleat, and it is left open.

IMG_3023 IMG_3024

All pleated, from the back.

Step 20. Buttons

 IMG_3025 IMG_3026

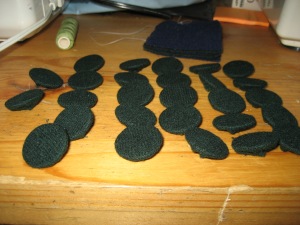
Make a whole lot of covered buttons. I used washers to make my buttons. 12 for the front, 3 for each cuff and pocket flap, and 2 for the tops of the back vents. So….26 total. Have fun! Sew them on. Have some more fun!

Step 21. Find a better model then I did and take some pictures!!

IMG_3032

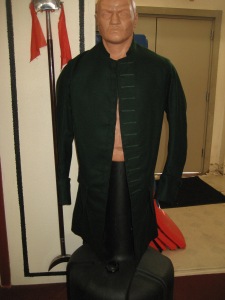
My camera died after this picture, and I had to give it to Jim that day. I will catch him in it and take some good pictures, then update the tutorial.

Historical Sew Fortnightly

Well this year has gotten off to a slow start! But…we started back to work last week and have mostly gotten all of the mess from Christmas in the Colonies and A Christmas Carol all washed and put away. Our first project of the year is an Irene Adler dress for our Sherlock Holmes play coming out in March. More on that as it comes along!

I decided to participate this year in the Historical Sew Fortnightly. I also decided that since I sew for a living any project that I make for work will not count (kind of a bummer for some things!), but only personal projects for myself and my family. I have had larger historical wardrobes in the past, when I was working the tours full time, but now I just want one or two good outfits in each era. I only work tour occasionally, but when I do I want to look good! I also want to start doing more events that will allow me to wear my historical stuff, so that is one of my goals this year. The first event I want to go to is Gibson Girls and Guys go Golfing. It’s through my costume guild, Costumers Guild West, Inc. It’s in March, so that gives me a few minutes to get outfits together for myself and my husband.

The first challenge for the Historical Sew Fortnightly (HSF) is Make Do and Mend. Some people are using up fabric in their stash and making do with patterns and things on hand. I had mending to do. Yay! So exciting. But…I had bones sticking up out of my stays, and my drawers needed attention.

IMG_0097 IMG_0099

And here are the stays mended:

IMG_0112

It’s ugly, but the canvas is starting to fray, so the stitching had to go far enough up to catch good canvas and cover the bad. We have a challenge coming up called Under it All, and I’m looking forward to maybe making a pair of stays for myself that actually fit (and mayhaps enhance my figure:).

Here are the drawers in their hastily fixed state (a state that did not work!):

IMG_0095

My drawers had been a little bit long in the crotch, just enough to be annoying all day long, so I did a quick fix and folded the waistband over and sewed it down. One of the problems with this is the extra bulk at the waist, and the other is that now the button and buttonhole were inside and backwards! And the waistband was shorter…and I’m slightly plumper then I was when I made them. I had to safety pin them very carefully, as I didn’t want the safety pin to pop while I was wearing them, especially as I wear them under my corset, and that would really hurt!!

Here they are fixed:

IMG_0110

I took off the waistband, cut about an inch off the waist and put the waistband back on.

I also mended my 1880’s teagown. We had used this style for work dresses, and for some reason everyone loves this dress. I have come to realize that this style is perhaps not the most accurate style to use for an everyday or wash dress, but oldies are goodies, and despite all the wear this one has a little more time left.

IMG_0117

It had a chunk of the hem missing, despite being ferreted, so I trimmed the icky bit and re-ferreted it. It also had a tear right above that and since I was at home I had no patching materials. I had found the piece of twill tape I used for the ferreting when I was going through my costumes looking for mending, so I just used that to mend the tear as well.

The next challenge (due Feb. 1) is Innovations. Something that was new and innovative in your chosen era. I have so many eras its hard to figure out what to use. But…I need hoops for my Civil War dress, so that might be my project. However, hoops of all kinds have been around for quite some time, so that might not count. Ideas? I’m open!!